|
Front Half Plastering
|
|
|
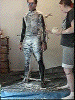
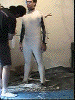
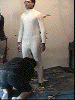
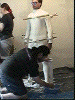
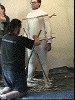
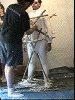
Now lets plaster the front half. Notice that we MOVED the model so that we could videotape this process. DO NOT MOVE THE MODEL. We actually caused grotesque deformities to the back half of the plaster bandages doing this. The model had to wiggle around and this moved him out of the position his feet and arms were in when we started. Again.... DO NOT MOVE THE MODEL.
|
|
|

|
Using Vaseline/Nivea make a 2 inch protective barrier on the edge of the back bandages. This will keep the front bandages from adhering to the back bandages.
|
|
|

|
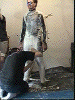
Go insane at this point and jump around like a ninny. Your model will appreciate the fact that you are wasting his time. - grin -
|
|
|

|
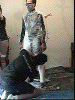
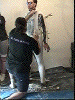
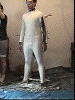
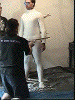
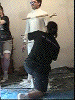
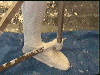
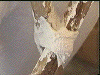
Lets slap a layer of bandages on the model. Overlap the front bandages about 1/2 inch to 1 inch over the back bandages. This will ensure you are getting a proper mold of the model.
|
|
|
|
Plastering the Upper Torso
|
|
|
|
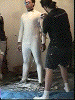
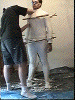
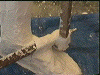
Here we are plastering the neck.
We did not do the head because it would bes disorienting to the model to be totally immobile. You can do a head cast later, which you could glue into place on the body cast. (Making a head cast uses the same plaster bandage techniques used in doing a body cast.)
|
|
|
|
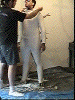
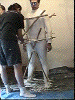
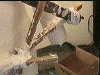
Now we place the support rod on the legs. Use plaster bandages to adhere the rods to the plaster model.
|
|
|
|
For the front cast we did not have any more "5 irons" so we had to use two sticks for support. One went from the abdomen to one arm and the other from the abdomen to the other arm.
|
|
|
|
We set a horizontal support rod across the collar bone area...
|
|
|
|
... and one on the top of the feet.
|
|
|
|
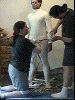
The model was afraid of not being able to control balance with the plaster on his feet. He was paranoid for no reason as he had no problem standing with plaster bandages on the top of his feet. He could control his balance very well as long as we did not try to plaster bandage the bottom of his feet.
Once the horizontal rods are in place, start laying down the second layer of bandages.
|
|
|

|
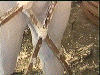
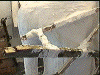
Place the Diagonal "X" supports on the cast.
|
|
|
|
Notice how we tied the rods together with the plaster bandage. The hardened bandages worked extremely well for what we wanted them to do.
|
|
|
|
Heres a view of the overlapped support rods at the abdomen. We used plaster bandages to strengthen the crossing ... therefore strengthening the entire support process.
|
|
|
|
The middle of the "X".
|
|
|

|
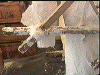
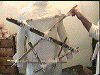
Here's the support attached to the wrist cast.
|
|
|
|
Strengthening the crisscross.
|
|
|
|
Wrist supporting.
|
|
|
|
Notice how this support rod did not lay in well. We placed the upper support rod too far UP on the chest and this caused us not being able to lay the "X" support rod flat against the upper-Support rod. We used a plaster bandage to make a "BRIDGE" which connected the two supports together. This is a good example of improvising.
|
|
|
|
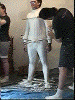
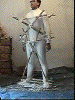
The Final Product.
|
|
|
NEXT: RELEASING THE CAST FROM THE MODEL
|
 |
|
|


