The Equator Area
The Interrogator Droid has this odd lighted equator running around its body. It's basically a lighted area sandwiched between some thick plastic sheets that the upper and lower domes attach to. FYI- The movie prop has a light of some sort circling inside the transparent area... due to time constraints we did not include this in our droid's design. You are on your own building the cicling mechanism. (grin) We need to create the odd components that make up the equator of the Interrogator Droid. I placed one of the Domes onto a large enough piece of 1/8 inch (3 mm) styrene and drew the circle of the dome onto the plastic.
 I needed to make a pattern for the transparent lighting panels that occupy the equator of the droid. There should be NINE panels around the equator. I messed up and put only 8 in mine. Please.... make yours with 9 panels. I used a compass to ensure that all my panels were to about the same length.

Cut out the dome circle and the panel lines from the plastic.
 The finished piece. This part will be used for the TOP dome... now let's make the part for the bottom dome.
 the bottom dome lighting panel has this odd geometric shape to it. It doesn't just curve around the dome like the top part does... it actually juts out from the dome and looks all menacing a stuff. I placed the pre-made upper dome panel onto a sheet of plastic, taped it down and drew the odd shapes around it onto the sheet of plastic. I then copied the 9 panel lines onto the sheet plastic also and cut everything out.

Here's the final lower lighting panel template.
 Now I need to make a support panel to back the two panels I just cut out. Here's a picture of a support panel taped to the lower lighting panel. The support panel should be cut out smaller than the dome so that the dome will cover the support panel. Glue and rivet these panel together.
 the lower dome and lower lighting template panel.
 For the Interrogator Droid's equator You will need 9 strips of plastic transparent panels. Finding plastic panels with a square grid work in it will be most authentic looking.
 I marked the 9 strips I needed onto the plastic panels and cut them out carefully with a very sharp Exacto blade. The plastic that these panels are made of is very brittle material... be careful not to shatter the plastic while cutting it. Notice that I did not mark the lines parallel to the grid work in the transparent panels ... I actually cut them at a diagonal line to the grid work. This little trick makes a world of difference in the final product.... It also gives the creator a major head ache when laying out the line work. (grin)
 I made my panels 1.8 inches (48 mm) high. I forgot that my Droid was only 80% the size of the original one and these 1.8 inch high panels are just a little too tall to be authentic. Please take care when measuring for authenticity. (grin)
 the panels lined up to its corresponding template cut out.
 Because my template cut outs were not accurate I marked each transparent panel to correspond to it's template side.
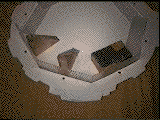
I hotglued the panels together , end to end. I used wood blocks to keep the panels standing straight wile I glued.
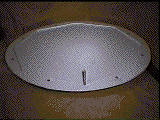 With the transparent panels glued together I used 2 inch (5 cm) long wood screws to connect the template panels together . The transparent panels served as the height supports for the equator.
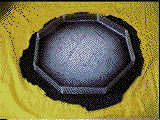
Now I just need to paint the equator panels and put the equator together.
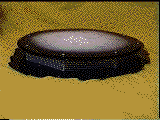
Here's the equator painted and screwed together.