Plaster Mold Making
 Okay Smatter-Brains, with the sculpting finished we need to pull a negative cast of the head so that we can make a latex skin. To do this we need to pour liquid plaster over the head and let it dry. You should do this plaster cast in two halves, a Front and a Back. Don't be an ignoramous and try to pour a solid plaster mold around the entire head, how the heck are you going to get the clay head out of the solid plaster? Sheez!
Lets make a "retaining wall" of clay to separate the two halves to begin with, pull the front half of the cast and then do the back half.
 To make the retaining wall we'll lay the clay into slabs about 1 inch thick and cut out strips to attach to the sculpture. I like to use EARTH, water based clay for the retaining wall. The Earth Clay Wall separates off the OIL Based Clay Sculpture much easier than an Oil Based Clay Wall would.
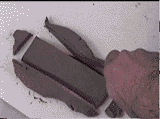
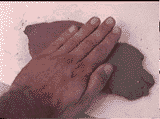
 Attaching the first slab of retaining wall clay.
 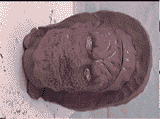 The retaining wall finished.
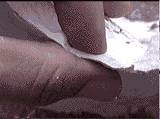
 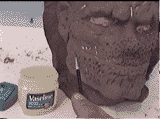 Before you slap on the liquid plaster you'll need to protect the clay with a release agent. I use vaseline for these low quality jobs.Professionals use a silicone agent. Two light coats of Cystal Clear Acrylic paitn does a good job too. Actually most mask makers use Clear Acrylic paint for most of their latex mask molds. It works well and is very cost effective.
 Covering the Sculpture with Plaster

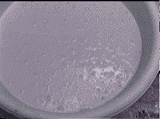
Here's the bowl of plaster and the sculpture before the plastering. Have a large plastic drop cloth on the floor, liquid plaster is very messy.
Usually plaster is mixed 2 parts plaster powder to 1 part water. (basically 2 cups plaster and 1 cup water, for you greenhorns)
 When mixing the liquid plaster you'll get a lot of bubbles. You need to get rid of these before pouring the plaster onto the sculpture. Bubbles in the plaster will show up in the final mask.
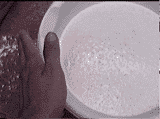 Tapping the mixing bowl will get rid of most of these bubbles.
 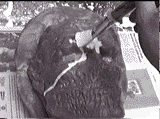 We start laying the liquid plaster onto the sculpture with a paintbrush. Plaster will leak everywhere. You just need to coat the top of the plaster a bit to get a good impression layer. This is a time honored technique. The more you do it, the better you get at it.
 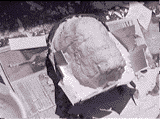 Once the plaster in the bowl gets thicker you can plop a final 1 to 3 inch thick layer onto the sculpture. You definetly want a minimum of 1 inch thick plaster over the entrire area. this thickness is crucial in keeping the cast in one piece.
 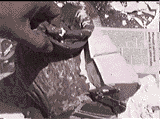 As soon as the plaster is solid (30 minutes -to- 2 hours of drying time) you can peel away the clay retainer wall.
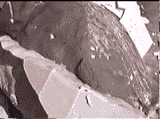
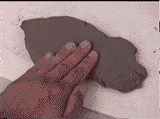
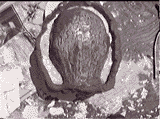
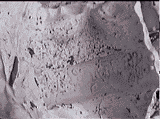
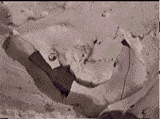
A side shot of the plaster half.
 Lets grease up the back of the sculpture and pour a plaster cast over it. You'll want to grease up the area that the two plaster halves will connect at also. Grease that up good or it will be very hard to get the two halves apart. A coat of Clear Acrylic paint wouldn't hurt here either.
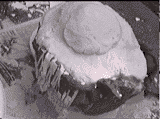 The back half plastered over.
Notice the tight connection area between the two halves.
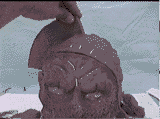
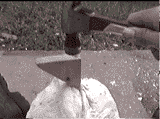 To split the two halves together you'll need to put a wedge block in between the two halves and lightly tap it.
 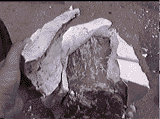 Well.... we tapped a little too hard and split the plaster halves into pieces. This is not good, nor is it the way this process is supposed to go. I guess if your gonna do a tutorial then you might want to show what NOT TO do.
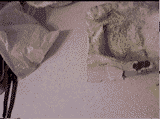
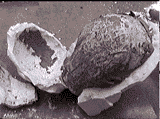 Here's the plaster half taken off the sculpture... let's try to knock off the front half now.
 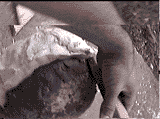 We'll tap it again with the hammer and wood block.
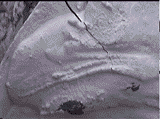
DARN! I tapped too hard again....
I broke this half in pieces too.
GRRRRRRRRrrrrrr...
I did it even worse now....
I knocked off the top of the head casts forehead... What a moron I am! You know what.. it's your fault... you the readers... you made me tap too hard! Grrrrrr....
 Ahhh... this is why the plaster halves are breaking into pieces. I didn't make sure that the halves we're a minimum of 1 inch thick. Look how thin this cast is in places. No wonder! You are all still to blame though. :-)
With the molds broken we will want to take superglue and glue the plaster mold pieces together. Below are picts of the glued together front half of the plaster mold.
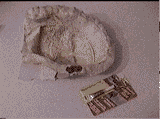
A few close -ups of the cracks that we superglued together. Notice that a few of the pieces were lost so we had to fill in the gaps with clay pieces.
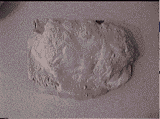
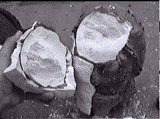
A shot of the plaster half, face up.
Basically you are wanting to pull a front and back half of the sculpture. These two halves will be connected togheter and latex poured into them, creating a rubber mask of the sculpture. The breaking of our molds is pretty rare. We got over confident, rushed the plaster job, and thats why our plaster molds broke, pure and simple (... and it's the readers fault).
If you take your time, and make sure your plaster molds are a minimum of 1 inch thick, then this should not happen to you.
Gluing the pieces back together cost us a whole day. We had to wait till the glue dried before we could attempt the pouring of the liquid latex. It was not a productive day for us, so sayeth The King!
|
|
The Monstermakers.com Mask Making Handbook is one of the best references for doing latex masks. Worth every penny. BUY IT NOW!!!! |
Next: Pouring the Latex